Kitchen DIY: How to make your own pickles | Vegan
I highly recommend getting familiar with the instructions before starting the process.
Ingredients
First Day
- 7-8 lbs organic pickling cucumbers
- 1 cup sea salt
Second Day
Canning Kit: 7 x 1 L mason jars with rust-free lids (the lids with rubber should not be used twice for canning)
- 35 grains of peppercorns
- 1 Tbsp sea salt
- 7 1/2 cups spring water or filtered water
- 6 1/2 cups organic white vinegar (buying organic white vinegar is important since most cheap white vinegar is made out of GMO corn)
- 14 garlic cloves peeled and cut into 3 or 4 large chunks
- 3/4 cup dill coarsely chopped
Instructions
-
First day:
-
Wash all the cucumbers thoroughly, stab with a fork all over, and stack into a large glass or ceramic bowl (no metal). Rub each layer with a generous amount of grey sea salt (small handful). Keep stacking until you're done. Add a handful of grey sea salt, and cover with filtered water. Put something (clean) heavy on top to keep all the cucumbers under water.
-
Soak for at least 12 hours, and up to 24 hours. (I left mine for about 20-22 hours)
-
Second day:
-
You'll need 7 x 1 L mason jars (wide mouth) with rust-free lids (the lids with the rubber should not be used twice for canning), as well as a very large canning pot & rack, plus canning tongs to take the hot jars out, and some tongs to take the lids out. Make sure everything you use is perfectly clean.
-
Fill the canning pot with water, enough to have about 1" of water above the mason jars.
-
With the empty mason jars in the pot, bring to a boil. (This will take a while! it took about 90 minutes for me)
-
While you're waiting for the water to boil, you can prepare the rest.
-
Rinse all of the soaked cucumbers very well to remove all of the salt. Depending on the size of your cukes, you can leave them whole if they're small enough, or cut them in quarters if they're large like mine were.
-
In a medium-size pot, prepare the brine: mix the vinegar, water and sea salt, bring to a boil, then reduce temperature to medium-low. Cover to make sure your liquid doesn't evaporate while waiting.
-
Peel and cut your garlic cloves.
-
Wash, and cut the dill.
-
Get your sea salt and peppercorns ready.
-
Get your canning tongs and utensils ready, with a few clean dish towels ready.
-
You'll need an area ready to receive hot jars (I used a cooling rack set over a clean dish towel).
-
Make sure you set all of this up ahead of time, because thing will go very fast once the process is started. ;)
-
Once the water is boiling (be careful!), set the timer for 10 minutes, this will sanitize the jars. Add the lids as well, or if you prefer, boil them in a separate, smaller pot. Boil for 10 minutes. Be very careful with boiling water that might splash.
-
After 10 minutes, reduce the temperature to medium heat, and using the special canning tongs, carefully remove the mason jars from the boiling water, one at a time. Carefully empty the hot water in the sink. One at a time.
-
Get the lids out too and put on a clean dish towel.
-
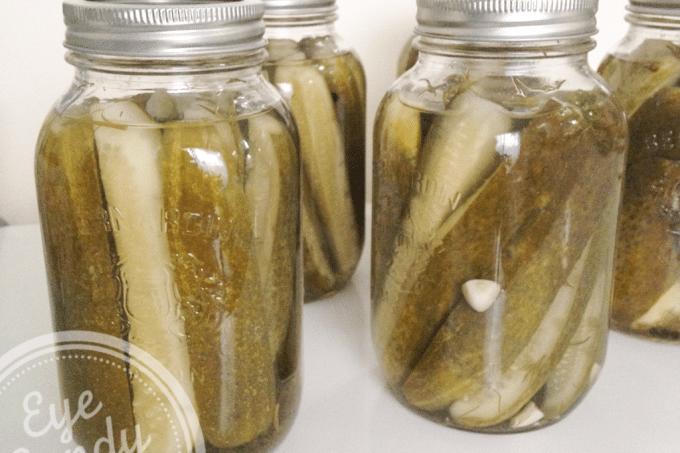
As quickly as you can, equally distribute the garlic and peppercorns into each jar, and fill with all the prepared cucumber. Pack as much as you can inside, leaving an inch of space at the top.
-
Fill each jar with the brine, again leaving about an inch of space at the top.
-
Still working as quickly as you can, screw the lids on each jar, tight but not too tight, and carefully return each jar to the hot water canning pot (with a rack at the bottom) using the special rubber canning tongs.
-
Add extra water if you don't have at least an inch of water over the jars.
-
Increase the temperature and bring back to a boil, set the timer for 15 minutes.
-
After the 15 minutes is done, turn the heat off, and leave the jars in the pot for an additional 5 minutes.
-
Then remove all the jars carefully and leave on a cooling rack, untouched. As they cool down, you will start hearing little "pops" (probably after 15-20 minutes or so), that means it's being sealed. After you've heard the "pop", you can tighten the screw lid a bit more. Then leave untouched for several hours until fully cooled down.
-
Once completely cold, you can put away to store in your pantry for many months, up to a year or more.
-
Yummy homemade pickles!
Note: I do not believe anyone should worry about counting calories, but here is the nutritional information for one serving
Calories: 109kcal | Sodium: 17195mg | Potassium: 684mg | Carbohydrates: 12g | Fiber: 3g | Sugar: 6g | Protein: 3g | Vitamin A: 715% | Vitamin C: 20.7% | Calcium: 119% | Iron: 1.7%